Get started with the VS Code extension
This tutorial is a quickstart guide to setting up and using the official CircleCI VS Code extension. You can read more about the extension’s capabilities in the overview.
Prerequisites
Before starting this tutorial, make sure you have:
-
Installed VS Code (version
1.67or above). -
A CircleCI account (you can sign up for free).
-
A project you follow that is building on CircleCI.
-
CircleCI server users: your self-hosted server URL.
1. Install the extension
There are two ways to install the CircleCI extension:
-
In VS Code, click the Extensions icon on the left-hand Activity Bar, or open View > Extensions.
-
Or, download the extension from the VS Code Marketplace.
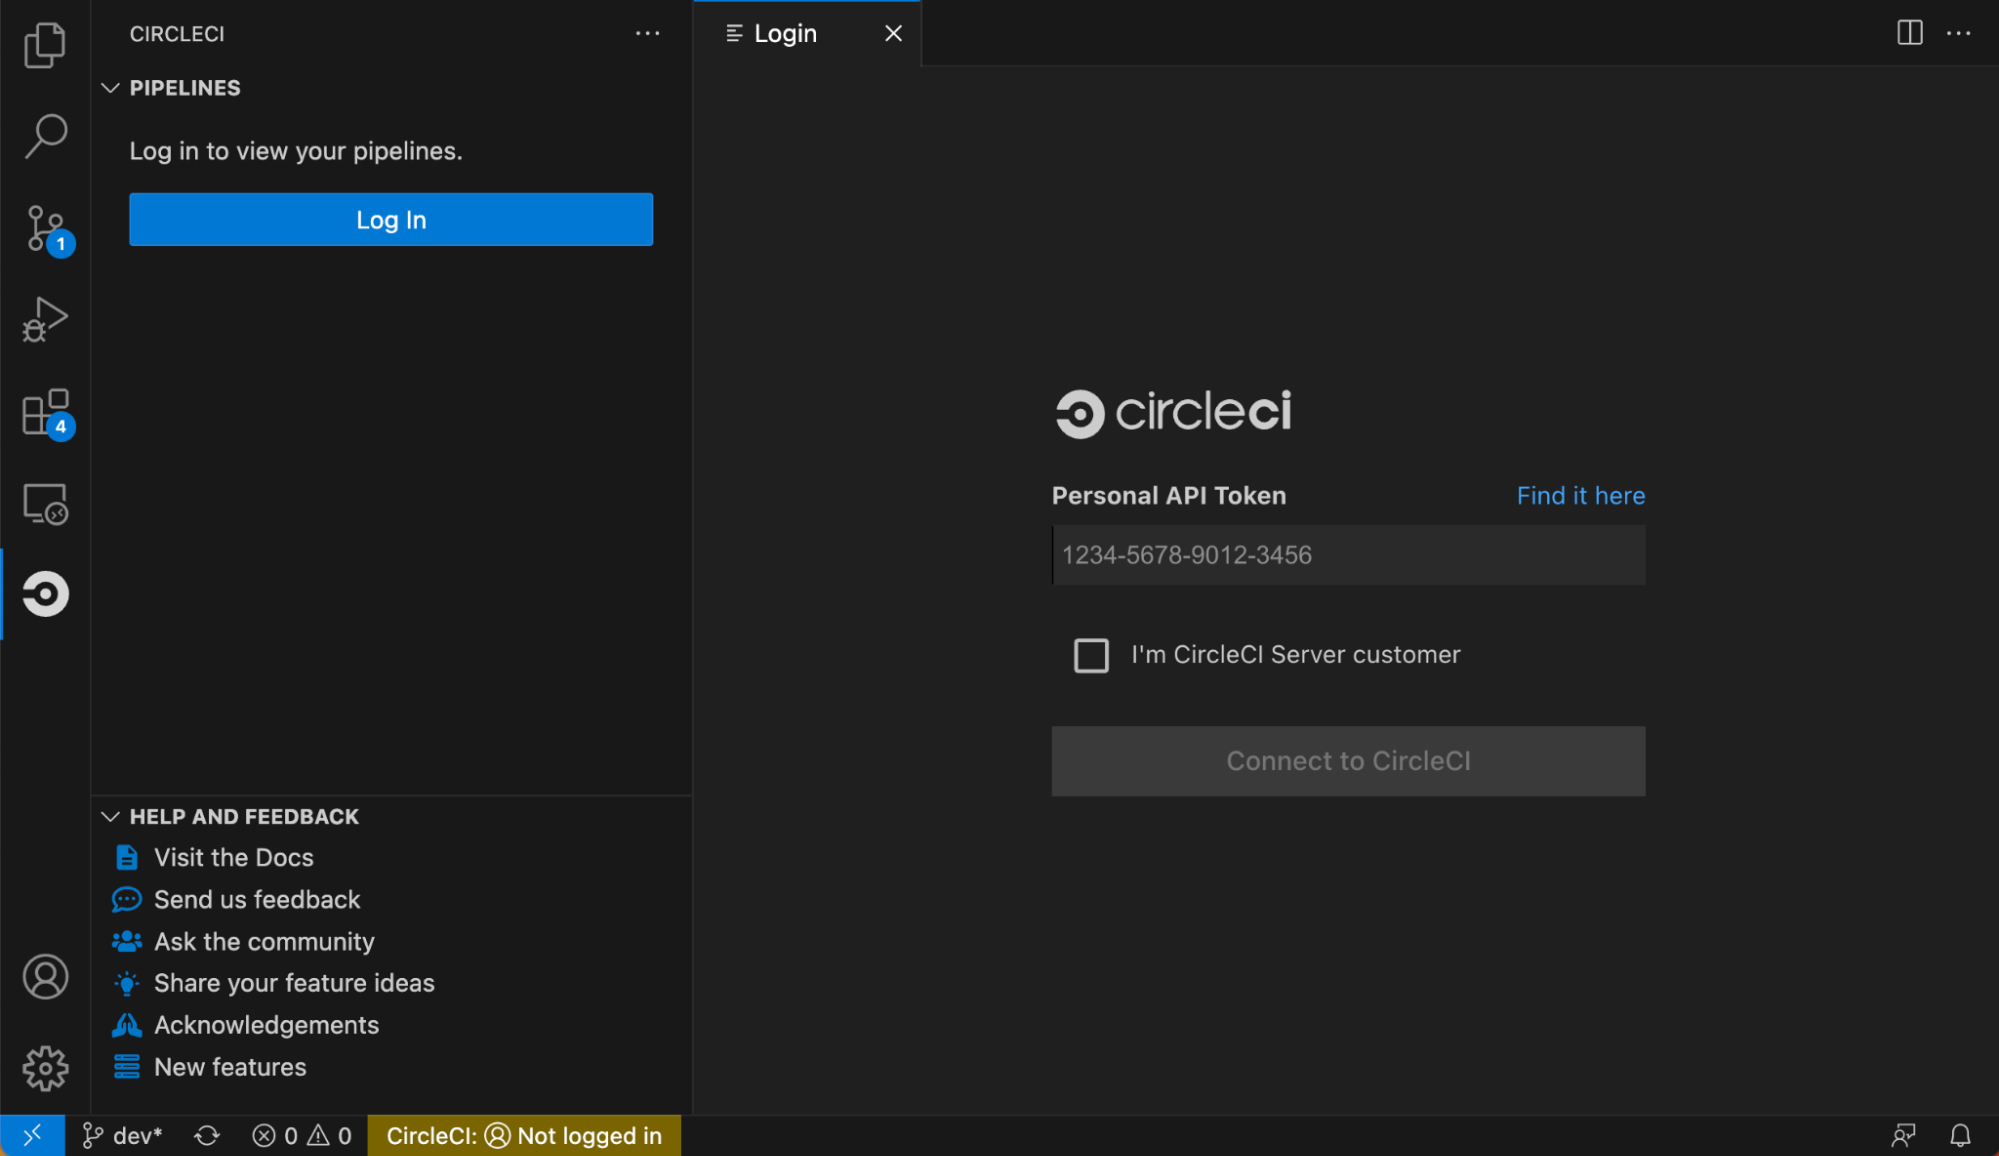
2. Authenticate into CircleCI
-
In VS Code, open the CircleCI panel by clicking on the CircleCI icon on the activity bar, then click “Log in”.
-
You will be prompted to enter a personal API token. You may create one in your CircleCI User Settings > Personal API Tokens.
CircleCI server: Make sure to check I’m a CircleCI server customer, then enter your self-hosted server URL.
3. Set up your project in VS Code
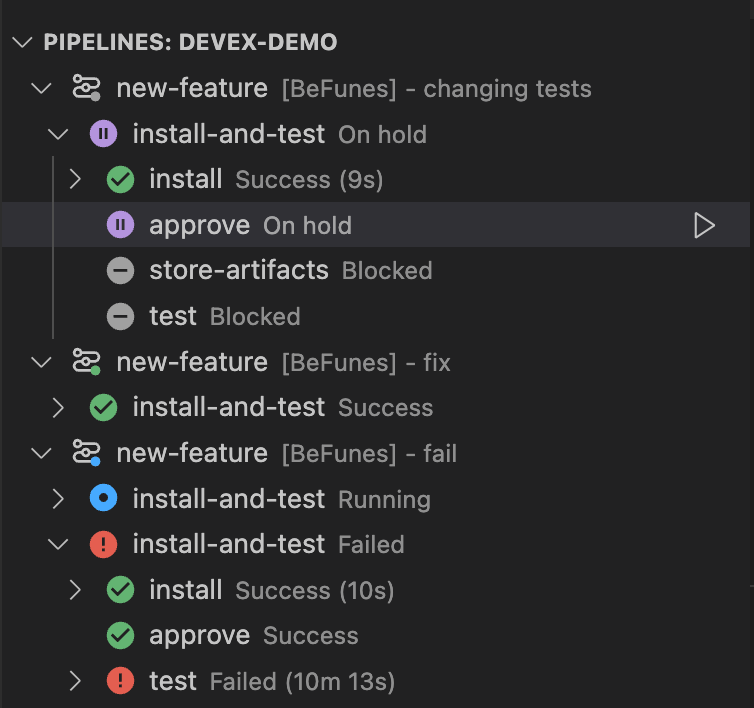
If your VS Code workspace contains one or more CircleCI projects, the extension will detect them automatically, and the pipelines panel will be populated with your most recent pipelines.
If no project is detected, open the extension’s settings page (either through the VS Code command CircleCI: Open Settings, or by clicking on the settings icon () at the top of the pipelines panel), and select your projects manually. Only projects you follow are listed for selection.
| GitHub App and GitLab projects: The pipelines manager does not yet support automatic detection for GitHub App and GitLab projects. Select your project manually from the settings page. |
| Your manual selection will only persist if no projects are detected automatically. |
4. Configure the pipelines panel in VS Code
By default, the pipelines panel displays all the latest pipelines run on your project. However, you can also configure it to show only the pipelines you are interested in. You can do so in the extension’s settings page (run CircleCI: Open Settings from the Command Palette, or click on the settings icon () at the top of the pipelines panel).
Specifically, you can choose to display:
-
All pipelines triggered by any user (author), or only pipelines you trigger.
-
All branches, only your current branch, or a specific branch.
-
You can also choose to “Always display default branch.”
-
-
Only pipelines that include workflows with specific statuses.
5. Configure notifications
By default, you will receive VS Code pop-up notifications every time one of the workflows in your pipelines panel enters a failing status, or needs your approval.
You can configure specific workflow status changes you want to be notified for in the Settings page.
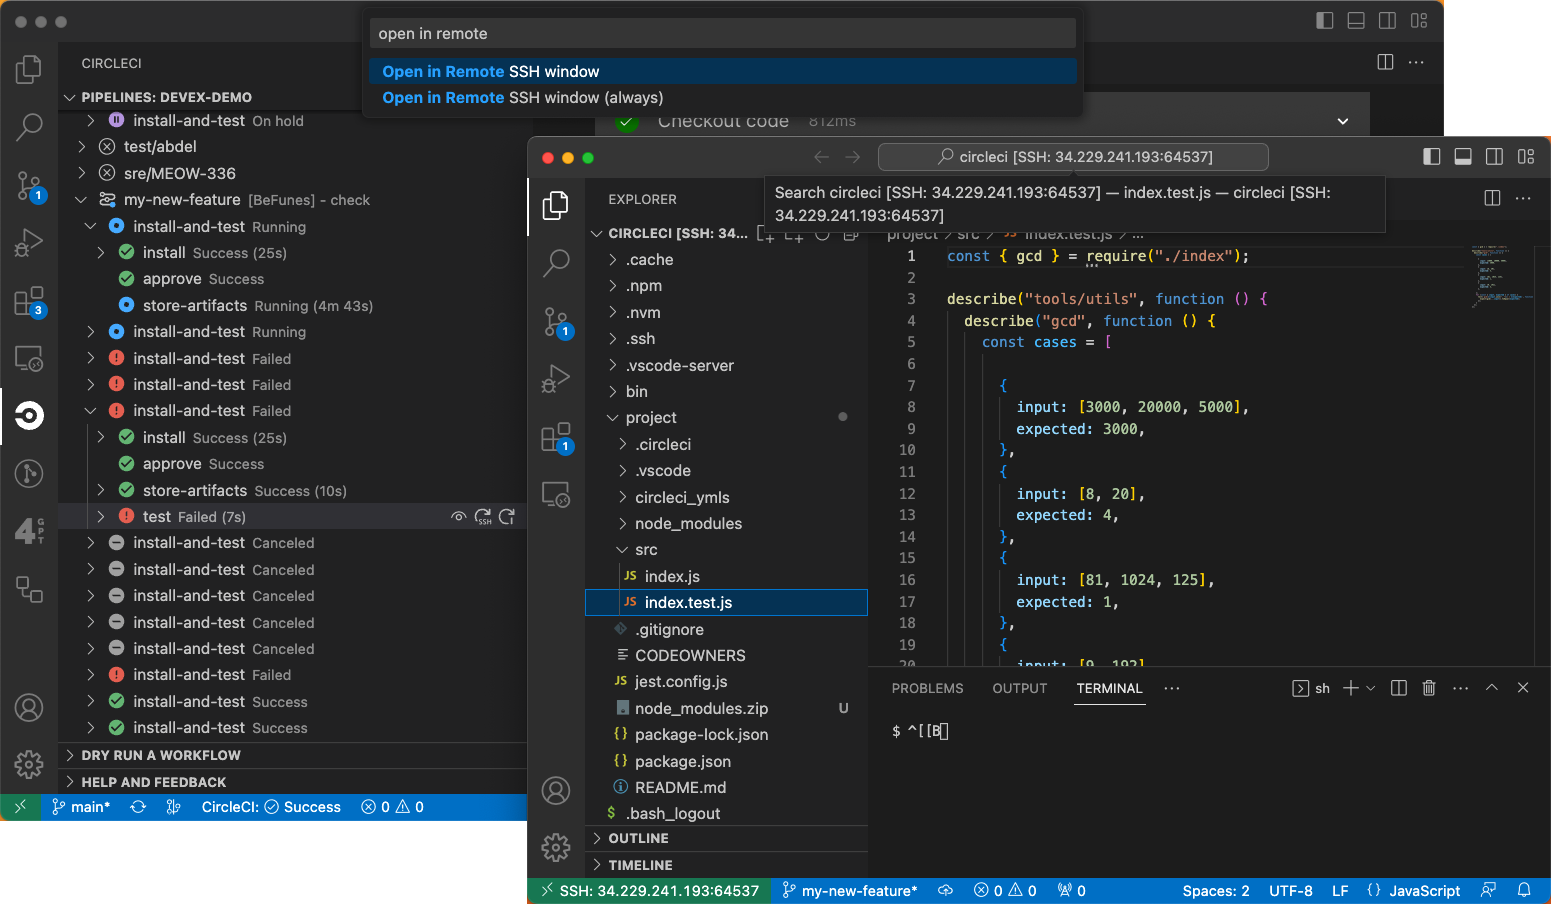
6. Configure SSH keys
The extension allows you to rerun jobs with SSH directly from within VS Code, either in the terminal or in a remote VS Code window.
The SSH functionality uses the same key that you use for your VCS. The easiest way to configure SSH keys for the extension is to try re-running a job with SSH, by clicking on the action icon next to the job.

In the Command Palette, you will be asked to select whether you want to start an SSH session in the terminal or in a remote window. The extension will then try to find your key automatically. Follow the prompts to finish configuring your SSH key.
Alternatively, you can configure SSH keys for the extension manually through the Settings page.
To open an SSH session in a dedicated VS Code remote window, you need to install the official Remote Explorer extension for VS Code.
| GitHub App and GitLab projects: Re-run with SSH from VS Code is not yet available for GitHub App and GitLab projects. |
7. Open a config file to test language support features
The extension integrates a Language Server specific to CircleCI configuration files.
-
To verify that language support is working, open a
.ymlfile in a.circlecidirectory.Even without taking any further action, you should see:
-
Syntax coloration is applied.
-
Red warnings appear if you introduce syntax errors.
-
You are able to use go-to-definition commands on the file.
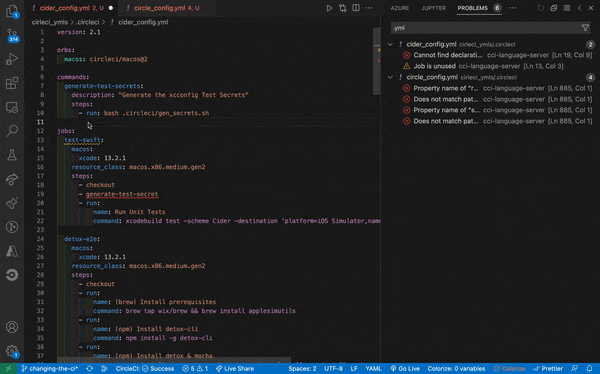
If you do not see any syntax coloration, you might be using a VS Code theme that is not compatible with our syntax highlighting.
-
-
Open the "Problems" panel to access diagnostics. The panel lists warnings and issues detected by the extension.
If you do not see any of the above language support features, try running the command CircleCI: Restart Language Server. |